Render & VFB

Every time you add an Unwrap UVW modifier, the Width, Height, Faces and Edges colors, will be set to the Unwrap UVW modifier defaults. However, you can reset them to the default PolyUnwrapper settings you saved by pressing the "Reset" button. Width, Height, Faces and Edges colors are stored by Modifier, so if you apply three modifiers, you can store different image sizes and color for each one of them.
1. Render Faces
Render all the Faces, independently if they are hidden or not.
2. Render Selected Faces
Render just the selected Faces.
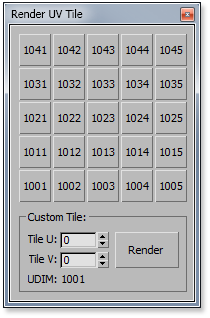
3. Render UV Tile
Allows you to render Shells that are outside of the 0-1 space.
4. Render Selected Edges
Render only the selected Edges.
5. New Render Open Edges
Render only the Shell's Open Edges.
6. Save
Save the current rendering settings as default.
7. Width & Height
Set the width and height of the Template.
Get Selected Map Size button, allows you to get the size from the bitmap already displayed in the UVW Editor to be used as the render size.
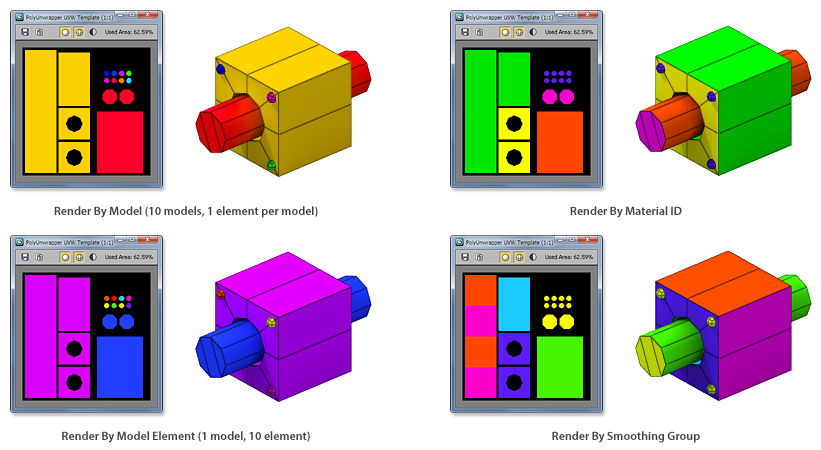
8. Render Mode
Define how the Shells will be rendered.
Plain: Use the selected color for all faces.
Model: Use one color per model.
Model Elements: Use one color per model element.
Material IDs: Use one color for each Material ID.
Smooth Groups: Use one color for each Smoothing Group. Shared Smoothing Groups renders with a different color.
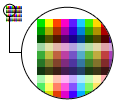
Bounding Rect.: Render the Shell's Bounging Rectangles only using one color per rectangle.Note: The palette used to render the Models and Materials IDs is defined by an image "id_palette.png" found in "PolyUnwrapper/ui" folder. The default palette image has 256 colors.
You can create your own palette and replace this file. It needs to have one color per pixel, and there are no restrictions about the width or height of the image.
If the amount of elements to render is higher than the amount of colors in the image, the palette will switch to Dynamic Mode which will adjust to the amount of colors needed.
9. Color
Define the colors used for the Faces and Edges while rendering in "Plain Mode" or to render the Selected Edges.
10. Edge Width
Define the Edge width.
11. Reset
Reset the rendering settings to default.
Virtual Frame Buffer
The Virtual Frame Buffer is a custom implementation, designed to handle the rendered UV templates more efficiently.
Unlike the standard 3ds Max VFB, it has features to show/hide faces and edges and also includes a feature to measure the used texture area.
You can use the mouse wheel to zoom in/out, and any of the primary mouse buttons to pan the image.
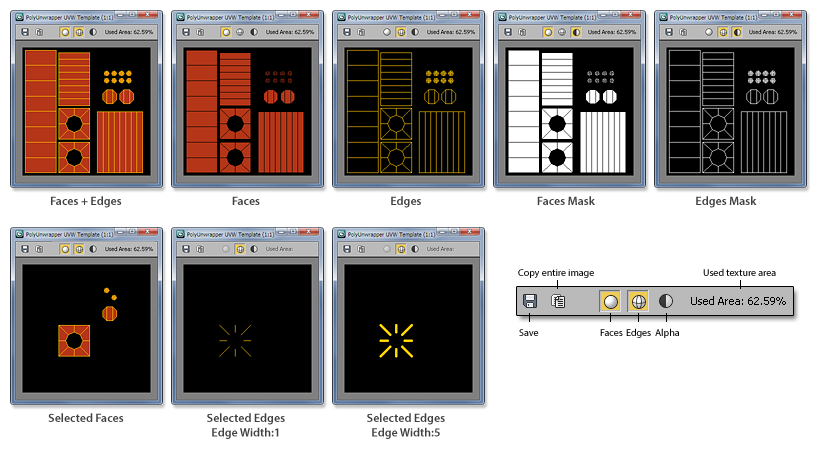
Save
Open the standard 3ds Max Save Image dialog, to allow you save the template in all the 3ds Max supported image formats.
Copy
It copies the entire image displayed to the clipboard, regardless of the viewed area, which makes it easy to paste in Photoshop, or any other image editor.
Faces
Displays the interior faces, without the surrounding edges.
Edges
Display only the rendered edges.
Alpha
Display a 1 bit image of the Faces, Edges or both.