Mapping

1. Select Open Edges
Select all Open Edges.
2. Expand Face Selection to Pelt Seams
Expand the current selected faces until they reach a Pelt Seam (blue edge).
3. Convert Selected Edges to Pelt Seams
Convert the selected edges (green edges) to Pelt Seams (blue edges).
4. Geometry Loop
Perform a Loop of the the selected Geometry Edges.
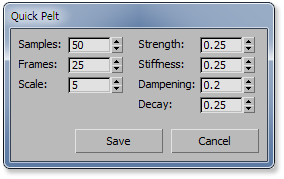
5. Quick Pelt Mapping
Apply a Pelt Mapping using the default PolyUnwrapper parameters.
Shift + Click: Clear the pelt seams on the selected faces and apply a Quick Pelt Mapping.
Ctrl + Click: Open then 3ds Max Pelt Mapping Dialog.
Right Click: Open a dialog to setup the default parameters.

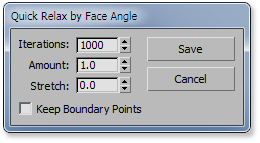
6. Quick Relax by Face Angle
Apply a Relax by Face angle using the default PolyUnwrapper parameters.
Ctrl + Click: Open the 3ds Max Relax Tool Dialog.
Right Click: Open a dialog to setup the default parameters.

7. Unfold Mapping
Perform an Unfold Mapping operation using "Walk to closest face" method.
Shift + Click: Use "Walk to farthest face" method.
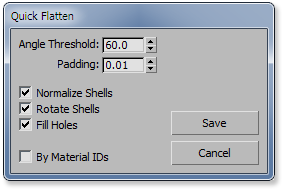
8. Quick Flatten
Applies a Flatten Mapping using the default PolyUnwrapper parameters.
Ctrl + Click: Open the 3ds Max Flatten Mapping Dialog.
Right Click: Open a dialog to setup the default parameters.

9. Quick Planar Mapping
Apply a Planar mapping on the Selected Faces using the average normal.
10. Select Pelt Seams
Select all the Pelt Seams, if any.
11. Clear Pelt Seams
Clear the Pelt Seams of the Selected Edges. If there is no selection, it will clear all the Pelt Seams of all models in the Editor.
12. Geometry Ring
Perform a Geometry Ring of the Selected Edges
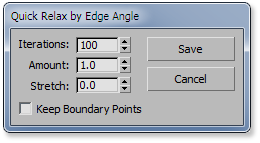
13. Quick Relax by Edge Angle
Apply a Relax by Edge angle using the default PolyUnwrapper parameters.
Ctrl + Click: Open the 3ds Max Relax Tool Dialog.
Right Click: Open a dialog to setup the default parameters.

14. Shift Cylindrical Texture
Rotate a cylindrical texture to match the selected edge.
15. Quick Cube Mapping
Apply a Cube Mapping (cross) to the Element. It works only on Elements or models with 6 polygons for Editable Poly or 12 faces for Meshes.